Saturday, September 18, 2010

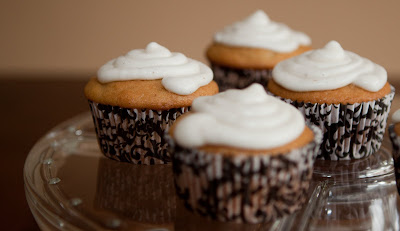
Vanilla Cupcakes with Blood Orange Olive Oil

This little treat came in my search to make the most of a special olive oil I recently purchased at "We Olive" in donwtown Ventura. The sales person sampled a lovely smooth olive oil with a tart blood orange flavor. The olive is sweet and savory at the same time.

This recipe includes a variety of my favorite ingredients. Olive oil, which is rich and smooth. Blood orange, reminds of my trip to Italy. Vanilla, the woody sweet notes are my favorite of all.

These cupcakes are so simple to make and can made in less than an hour! You could use plain olive oil in these, or hunt down your own special flavor at "We Olive" like I did. Another cool thing, is that "We Olive" will fill your containers with oil or vinegers for a per ounce fee. What a great way to try some new flavors!

Vanilla Cupcakes with Blood Orange Olive Oil


Ingredients

1 1/4 Cup Flour

1 tsp baking powder

1/4 tsp baking soda

1/2 tsp salt

1 cup plain nonfat yogurt

1/2 cup white sugar

1/4 cup light brown sugar

1/3 cup blood orange olive oil (regular olive oil is okay!)

1 egg white

1/2 vanilla bean (removed from pod)

1/2 tsp vanilla extract

How To:

  1. Preheat oven to 350 degrees. Prepare cupcake tin with cupcake papers. Aproximately 12.

  2. Mix flour, salt, baking powder and baking soda.

  3. In seperate bowl, mix egg white, yogurt, vanilla bean, vanilla extract, and sugar until smooth.

  4. Blend the wet ingredients into the dry ingredients. Mix util smooth and free of lumps.

  5. Portion into cupcake papers.

  6. Bake until golden grown. 20-22 minutes. Use a toothpick to test if done. If the tooth pick is clean after plunging into a cupcake it is done. If sticky when it is removed, continue cooking until done.

  7. Let cool.

Vanilla Bean Frosting

1 Stick unsalted butter, softened

4 Cups Powdered Sugar

3 tsp milk or half n half

1/2 vanilla bean (removed from pod)

1 tsp vanilla extract

  1. Warm milk in microwave for 10-30 seconds. Acoid scalding

  2. Add vanilla beans to milk and let stand 10-20 minutes until cool.

  3. Blend butter, milk, vanilla beans and powdered sugar until smooth.

  4. Allow to set and frost cupcakes. If you prefer a runnier glaze, add 1-2 tsps more milk to thin.

  5. Enjoy!


These are very simple and I hope you try this recipe!


Sunday, September 5, 2010

Creme Brulee with vanilla beans

This is a recipe that requires a little bit of time, but is worth the wait. Most the time you need is passive, letting the creme brulee cool in the fridge before serving.

The traditional creme brulee recipe is a french one, an translates to burned cream. The recipe is also made in other countries, using a similar process, called a 'burnt cream' or 'trinity cream'. The recipe is one of an egg and cream custard with a hard caramilized crust. The dessert can be served chilled or warm. I prefer chilled.

The recipe also requires some form of heat to caramilize the sugar top. I first used the broiler method, using the broiler feature in my oven. This takes quite a few minutes and heats the custard to a warm temperature. Some comments on recipe boards say that you can wrap the custard in ice, on a pan to offset the heat of the oven. This seems like too much effort! So I purchased a small butane torch at a discount hardware store - Harbor Freight. The $4.99 purchase was the right one to make.

The result a cold custard with a warm, crunchy sugared caramel top. PERFECT.

I would serve this with a lighter dinner, as it is a rich dessert. Serve with a nice cup of espresso or strong coffee.

Creme Brulee with Vanilla Bean

Serves 6

Ingredients:
10 Egg Yolks (room temperature)

1/2 cup white sugar

3/4 tsp vanilla extract

1 vanilla bean

2 cups heavy cream

2 cups non fat half and half (use all heavy cream if prefer a richer dessert)

6 tsps brown or white sugar for caramel top
  1. Preheat oven to 300 degrees.

  2. Beat egg yolks in a glass bowl. Bowl can be used later as teh double boiler.

  3. Mix in 1/2 cup sugar and the 3/4 tsp vanilla into teh egg mixture.

  4. Heat the cream and half and half in a saucpan.

  5. Split the vanilla bean. Mix the beans in the cream and add the bean to liquid. Heat to a low simmer. Allow the mixture to heat for about 10 minutes. Do not boil. Stir often to avoid scorching.

  6. Remove teh cream from the heat and allow to cool for 10 minutes.

  7. Slowly add warm cream to the egg mixture. Stir constantly to avoid scrambling the eggs. This step is called "tempering". It allows the eggs to be warmed to the same temperature as the cream, without cooking or scrambling the eggs. Continue adding teh cream until the mixture is smooth and well stirred.

  8. Bring a saucepan of water to a low boil. Place the glass bowl, with cream and egg mixture on top of the boiling water pan.

  9. Stir the mixture on the double boiler until the mixture coats the back of a spoon. 2-5 minutes. Do not overcook. Remove from heat.

  10. Pour into small baking dishes or ramikens. Place on a baking sheet.

  11. Bake for 30 mintes.

  12. Remove from oven. Allow to cool to room temperature. Cool in refigerator for at least 1 hour, or overnight.

  13. Add 1 tsp of sugar to each dish.

  14. Heat under broiler or with a butane torch until golden brown and bubbly. Do not allow to overcook and burn.

  15. Serve or refrigerate again until cold again.

Serve with coffee or espresso.


Stuffed Passilla Chile (Vegetarian)


This is an alternative to the heavier, more fattening Chile Relleno. A traditional Chile Relleno is a cheese filled chile, that is battered with an egg and flour mixture and deep fried. The fried chile is served then with a red chile sauce and again more cheese and or sour cream.

I admit, I love these decedent cheesy chiles, but only on rare occasion. They are of course super fattening and greasy! An alternative is a baked version.

This baked stuffed chile substitutes the cheesy filling with a rice and vegetable mix, that is only flavored by cheese. The chiles are baked and topped with a red bell pepper sauce and green avacado cream sauce. These are my new favorite light recipe.

The great thing about this recipe is that you can use most any chile or pepper that is in season or that you have on hand. Use a spicier or milder chile to meet your tastes, the concept still applies.

Stuffed Passilla Chile (vegetarian)

For Stuffed Peppers:
4-6 Passilla Peppers
1 tablespoon olive oil
2 garlic cloves
1/2 cup diced onions
1/2 cup corn
1 small zuchini, diced
1/2 tsp cumin ground
1 cup cooked brown rice (white okay)
1 cup queso ranchero (or use other crumbly mexican fresh white cheese)
1/2 cup shredded monterey jack cheese
1/2 cup chopped fresh cilantro
salt and pepper to taste

For Red Bell Pepper Sauce:
2 Red Bell Peppers (roasted and skin removed)
1 garlic clove
1 tablespoon balsamic vineger
4 ounces plain nonfat yogurt
1/2 tsp cayenne pepper
1/4 tsp salt
1 tsp lemon zest
1 tsp lemon juice
2 tablespoon grech chopped cilantro
1 roasted jalapeno skin removed
For Avocado Cream Sauce:
1 ripe avocado
2-4 tablespoons Lemon juice
1 cup nonfat plain yogurt
1/2 cup fresh chopped cilantro
1 roasted jalapeno skin removed
salt and pepper to taste
Stuffed Pepper Steps:
  1. Preheat oven to 400 degrees.

  2. Roast the pasilla and red bell pepper in oven or on grill. Remove charred skin. I place in a bag to steam for about 5 minutes before removing skins.

  3. In a saucepan saute the olive oil, onions, garlic, zuchini and corn until cooked but not browned.

  4. Add cumin, rice, cilantro, salt and pepper. Cook for 2 minutes until combined. Remove from heat

  5. Add crumbled mexican cheese to the mix. set aside.

  6. Slit the pasilla chiles and remove seeds. I leave the stem to hold the chile together.

  7. Add the rice mixture to teh chiles. Arrange in 9x13 pan. Top the filled chiles with the shredded monterey jack cheese.

  8. Bake the chiles for about 24 minutes. Allow cheese to get bubbly and brown.

Red Bell Pepper Sauce

  1. Roast the bell peppers and jalapenos. Remove skins and seeds.

  2. Add the remaining ingrediants to a blender and process until smooth. Set aside to serve.

Avocado Sauce

  1. Place all ingredients into the blender and process until smooth. Add additional yogurt and lemon if too thick. Salt and pepper to taste.

Serve the peppers on a plate with a base of the red bell pepper sauce and a side of the avocado sauce. In the future I may serve with pinto beans to boost the protein of the meal. A very nice and fresh dinner. Also, good as a leftover as a chilled salad.


Tuesday, August 3, 2010

Yo Gabba Gabba Birthday Party!

So, being a mommy comes with lots of fun and new tasks. On eof my favorite tasks, although difficult at times, is planning for birthday parties. My son turned two in June and we decided to memorialize the day with


Saturday, July 31, 2010

Peach, Apricot, Mango, Vanilla Bean Preserve


So I have been in the bad habit of buying lovely stone fruit and allowing them to overripen before I have had a chance to enjoy them. I know when this has occured when I reach in the crisper and instead of a nice firm peach, I have a mushy mess to clean up. For this reason, I avoid buying too many of these great supple fruits when they are in season and then I miss out.

So, I found a great method to save the fruit and enjoy it for a much longer amount of time. I made up my first batch of stone fruit preserves using about 2lbs of peaches and 2lbs of apricots and I found I had about 1 cup of frozen mango that i had failed to use. I included one vanilla bean casing that I had already harvested the beans from. I also used the juice of one orange and a bit of lemon zest to keep the bright orange color and impart a bright flavor as well.

The fruits were blanched and the skins and pits removed. I cleaned some of the peaches of parts of the center that were extra tough. I cut the fruit into bite size pieces.
The fruits were added to my stainless steel pot. I added the juice of the lemon and 3 1/2 cups of sugar. I added the zest and the vanilla bean. the whole pot simmered for about 40 minutes. The sugar was dissolved and the fruit began to break down. I brought the mixture to roughly 220 degrees. I tasted the mixture and tested for the gel point.
The mixture was then jarred into about 3+ pints. I used the boiling method to seal the jars.


Grilled Chicken Lemon Basil Pasta

Complete food boredom drives me to my cookbooks, favorite blogs and websites to look for inspiration. Food boredom is described as a lack of ideas and creativity in the kitchen, often linked to an increased level of take out and fast food in my diet.
I went searching last weekend, in attempts to add some life to my dinner routine. I came across a simple recipe that was posted on the Pioneer Women's website. http://www.thepioneerwoman.com/

I made the recipe as follows, with my own twist. I added canned artichoke hearts that I grilled lightly. Yummy!

Grilled Chicken and Artichoke Hearts with Lemon Basil Cream Pasta

2 lbs chicken breast - marinated in balsamic vinager with extra garlic powder and Italian seasoning blend
10-15 Basil Leaves

1 cup half n half

1 cup heavy cream
2 Tbsp Butter

1 cup shredded Parmesan

4 lemons juiced
1lb penne pasta
16 oz can artichoke hearts
extra basil to garnish, used the blossom tops.
  1. Marinate chicken breast for at least 2 hour or overnight.

  2. Grill chicken and wrap in foil to keep warm.

  1. Oil artichokes and season with salt and pepper. Carefully grill and be aware they are slippery. Do not over cook as they will fall apart.


  2. Boil pasta to al dente. Drain and reserve one cup of pasta water.

  3. In same pot, melt butter. Add cream, half n half, and parmesan. Stir until melted and blended well.

  4. Add lemon juice. Mix well.

  5. Add pasta to sauce in pot. Loosen sauce with extra pasta water if needed.
  6. Serve pasta with chicken sliced on top. Garnish with the basil.

Enjoy!


Dill Pickles

Living in a house with a man who truly hates pickles and most anything vinegary is difficult. especially when you, yourself, love pickles, mustard and things with a tang. I have slowly intensified the vinegar in hi life, usually hidden in a marinade or sauce.
So, in my quest of canning, I decided to make the basic Dill Pickle.
I bought about 4 pounds of fresh small cucumbers from Shepperd Farm in Carpinteria. Thanks Kjessie for the berries too. I "borrowed" a few fresh springs of dill from friends Leslie and her mom Karen's garden.

I then went on what was a search of a lifetime. Who knew that finding pickling spices would take me to four different big box stores...argh!!! I spent far too much on what will ensure that I continue to make pickles for a few seasons to come.
So, last night I started by washing the cucumbers and saoking them in cold water and a cup or so of salt. I awoke this morning and rinsed the cucs. I removed both the stem and flower end of each cucumber. I discarded the soft and funky looking cucumbers. I removed dicolored or damaged areas.
I stuffed my pint jars with my dill sprigs and added a clove of garlic and sprinkle of the pickling spices to each jar. I filled the jars with my sliced cucumber spears. I left a few smaller cucumbers whole.

I started a pot of 1 part white vineger and three parts water. I added one cup of salt for this ratio. I added a teaspoon of the pickling spice. The mixture was brought to a boil.

Once the mixture boiled, I filled each jar. I lidded and boiling water bath canned the jars. Once the boiling process was complete, I left the jars to cool.
Now to wait 3-6 weeks to sample the pickles. I hope I can wait!!!


Sunday, July 11, 2010

Yogurt Blueberry Muffins


I bought a small blueberry bush last year. I added peat moss to the soil, to raise th acidity of the soil. The first year, nearly all of the leaves fell from the plant. i thought I had lost the plant. This year, the plant looked healthy and the plant even sprouted a few flowers. But, again no friut and the plant looks less than healthy. In anguish, and frustration, I went to the farmers market and purchased a few baskets of lovely blueberries.

What to make...

Blueberry Muffins.


I searhced the web and came across a simple blueberry muffin recipe. I adapted the recipe to my own pantry and came up with what I think is a very supple and delicate muffin. One of the changes I made was to add 1 egg white to lighten the batter. The recipe is light and fluffy and filled with berries.


Yogurt Blueberry Muffins


  • 3 Cups flour


  • 1Tbsp baking powder


  • 1/2 tsp baking soda


  • 1/2 tsp salt


  • 1/4 cup unsalted sweet cream butter (1 stick)


  • 1 cup sugar and 3 Tbs sugar to sprinkle


  • 2 eggs

  • 1 egg white

  • 1 1/2 cup white sugar


  • 1 tsp lemon juice and or lemon zest


  • 2 cups blueberries (dust with flour - 1 Tbsp)

Process


  1. Preheat oven to 375 degrees.


  2. Place oevn rack in middle of oven.


  3. Whisk flour, baking powder, baking soda, and salt in a large bowl.


  4. In a large bowl, cream the butter.


  5. Add sugar to butter and cream until fluffy.


  6. Add eggs, one at a time, mixing until creamy.


  7. Add lemon and or lemon zest and mix throughout.


  8. Beat in half of the dry ingredients.


  9. Mix yogurt in until smooth.


  10. Mix in remaining dry ingredients. DO NOT OVER MIX!

  11. Stir in blueberries until evenly distributed.

  12. Portion batter into 18-24 paper filled muffin tins.

  13. Sprinkle each muffin with a small amount of sugar.

  14. Alternatives: Brush muffin with olive oil and sprinkle with brown sugar before baking. Be cauious as it can burn due to oil.

  15. Bake muffins for 25-30 Minutes until light brown. test with a toothpick to ensure doneness. let rest for 5-10 minutes. Enjoy with butter or save till you need a yummy snack!


Monday, June 14, 2010

Swiss Chard and Chicken Enchiladas and Blue Margarita


A few weeks ago, I found that I wanted to make a recipe that I came across earlier this spring, in attempts to make better use of some of the produce that I had chosen at my weekly CSA - Shepard Farm shepherdfarmscsa.com. They have a wonderful selection of greens, vegetables, beans, strawberries, garlic onions and other lovely goodies. I had picked up a bunch of Rainbow Swiss Chard, which came in yellow, red, pink and magenta stalks, with lovely green tops. I searched and searched my favorite websites and came across the following recipe. The recipe is called Chicken Enchiladas "Swiss Chard". I made a few alterations to my recipe and they were as follows.

I started with the same basic ingredients as the base recipe but my recipe is as follows:
1 16oz can Red Enchilada Sauce (you could use green)
1 bunch Rainbow Swiss Chard 6-8 stalks
1 Small Leak
1 Cup cubed or shredded cooked chicken (leftovers are the best)
4-6 Taco Size Flour Tortillas, warmed over flame to make pliable
1-2 tsp olive oil
1 8oz package shredded cheese, I used a blend of monterey jack and cheddar

Steps
Step 1 - Chop chard into small strips, seperating the stalks from the leaves
Step 2 - Chop leak (white or light green only) into small pieces
Step 3 - Preheat Oven to 350 degrees
Step 4 - Saute the leaks and the chard stalks in the olive oil, when they appear transulent, add the chard leaves and cook until tender, remove from heat.
Step 5 - Add chicken to the chard/leak mix, blend well
Step 6 - Assemble. Place a few tsps of enchilada sauce into a 8x8 pan. Take warmed torilla and add chicken mix and a nice sprinkle of cheese and roll. Place rolled enchilada in pan. Continue until pan is filled. 4-6 enchiladas.
Step 7 - Pour remaining enchilada sauce over the top. Top with cheese. Step 8 - Bake. Bake pan covered with foil for 15 minutes. Uncover and make for an additional 12-18 minutes until bubbly and browned.

Step 9. - Serve. Serve with a little bit of cilantro and a helping of Magic Spanish Rice (recipe to follow) and a blue margarita (also to follow).

The surprising thing about these enchiladas is that although they have a nice serving of vegetables, you can not really notice, as the chard is mild and blends well with the other ingredients. The chard is also tender and adds a nice texture to the enchiladas. I also like the flour tortilla, as it almost melts into the ingrednients to create a nice layer of flavors and textures.
Blue Margarita

1 Shot Silver Tequila

1 Shot Blue Cuaraco

Ice

2 Shots Lemon or Lime Juice

splash lemon lime soda

Shake till frothy. Pour in glass and add ice to keep chilled. Serve with salt if you'd like.


Sunday, June 6, 2010

creative therapy

I often wonder why i never went to school to become a chef, artist, or something that would allow me to be creative during my work week. I instead went with the more logical part of my brain and went to school and obtain a BA in Environmental Analaysis and Design and will finish my MA in Urban and Regional Planning this fall. I work as a planner for a great city, love the people I work with and love helping people. Therefore, I am very happy with my choice.

But...on occassion, most weeks, I need something, something to resolve the feeling of unease, a feeling of incomplete, a feeling...like I need to have a nice therapy session. My therapy has become the creativity of my youth.

I have recently started to really focus on my photography, both as a hobby and a second profession. I love creating images FOR others and not just myself. I love the act of sharing something I have developed and worked to create that can be loved and shared by others.

I found that as a child I created to gain the approval of my family and friends. I now find that I am my own critic and my own solice. I am my own best and worst enemy.

Creating, whether cooking, painting or photographing, takes me far away. I can drift and let my brain focus on something less serious, something more fun. ART!!! EMOTION!!! LIFE!!!


In the garden...

In the garden, i find that I can grow both a tasty tomato or two, but also a sense of relaxation and peace that I usually only find when I am completely in nature. In my garden, I have a small planter box and a few potted plants. My garden is small but fruitful. At right is my first red fruit. He was hiding way in the back. Must be why the birds haven't seen him yet!!!


Last year, my first year, I had far too many tomatoes and unfortunately, many went to waste. This year, I have chosen to choose fewer plants, but have chosen mostly heirlooms and a few hearty breeds of roma and sandwich tomatoes. My plants are strong, many have small fruits, some quite large.

I also have a nice herb garden. I have common sage, mexican sage, cuban oregano (smells like something illegal), black basil, sweet basil, thai basil, oregano, margarom, rosebary, thyme, and a few more that don't come to mind. Pictures at right is Mexican Sage!

I have a few fruit trees, which have not yet proved to be so "fruitful". I have grafted apple tree, which has three types of apples on it. Only one branch, has fruited well this year and I hope they stay through the summer and ripen. Last year, all but a few had bugs or fell in a wind storm. I also have a blood orange tree, meyer lemon "bush", a traditional lemon, and two necterine bushes. Oh, and I shouldn't forget the lone pomagranite tree I planted in the front yard. The problem with the placement of this plant comes from the neat little bloom which is bright red. I think the neighborhood kids find it interesting and steal it away before the fruit can set. oh well. :)