
Personal and family blog. Including recipes, vacations and other things that make me - ME! Blog by Shanna Farley-Judkins
Monday, May 16, 2011
a Little Fruity, and a Little Nutty Granola Bars

Saturday, April 2, 2011
Chocolate Banana Cupcakes with Marshmallow Frosting

- 1 Cup Mashed Ripe Bananas (2-4 Bananas)
- 3/4 Cup Cocoa Powder
- 1 1/2 tsp. Baking Powder
- 1 1/2 tsp. Baking Soda
- 1/2 tsp. Salt
- 2 Large Eggs
- 1 Cup Warm Water
- 1/2 Cup Milk
- 1/2 Cup Vegetable Oil
- 1 1/2 tsp. Vanilla Extract
1. Preheat oven to 350 degrees.
2. Prepare cupcake pans (24 cupcakes total) with paper cups
3. In mixer, blend the water, milk, eggs, oil, vanilla, and bananas until smooth.
4. In a separate bowl, blend the remaining dry ingredients. Ensure that there are no lumps in the mix by sifting if needed.
5. Add the dry mixture to the wet mixture. Blend until well mixed.
6. Portion the batter into each of the cupcake pans.
7. Bake the cupcakes for 18-22 minutes. Test the cupcakes with a toothpick to make sure the batter is well cooked and no longer sticks to the toothpick.
8. Let cool very well before frosting.
9. Frost as suggested below.
Marshmallow Frosting
- 8 Egg Whites
- 2 Cups Sugar
- 1/2 tsp Cream of Tarter
- 2 Tsp Vanilla Extract
Sunday, February 13, 2011
Blood Orange Sorbet REPOST
Dark Chocolate Peanut Butter Cups
This is the finished treat.

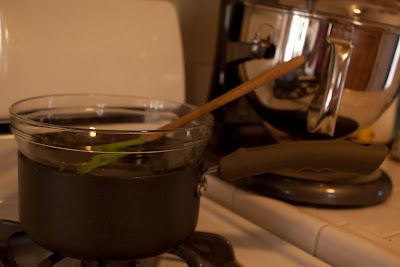
I ran through the recipe, posted on design*sponge website, http://www.designspongeonline.com/2011/02/small-measures-chocolate-peanut-butter-cups.html. I needed a double boiler. Check, I have a glass bowl, sauce pan and a spoon. I needed peanut butter, sugar, chocolate, graham crackers, salt and powdered sugar, check. I decided to add vanilla, since I add vanilla to all my desserts.
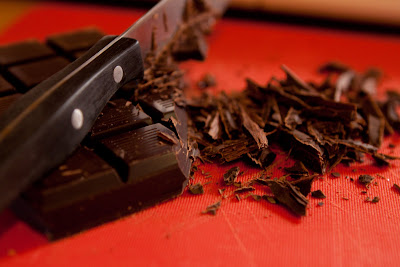
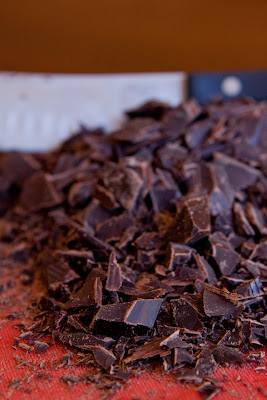
I used a mix of chocolate. I had 1 - 1 pound block of Trader Joe's Dark Chocolate. I think it was a 72% Dark. I thought this was a bit dark, so I added some semi-sweet Ghiradelli Chips to soften the richness. They are still VERY RICH still. The chocolate takes a bit of muscle, but it is well worth a good chop to reduce the melt time. Remember-reserve half of the chocolate to melt for the tops of the cups.

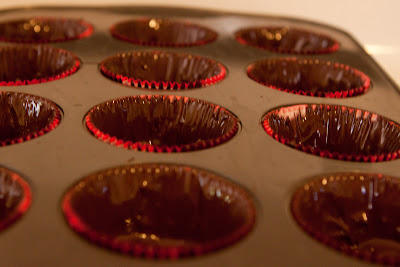
I used a silicone basting brush to coat the cups with chocolate. I highly suggest investing in one of these, as they are far easier to clean. I assume that means they are far more sanitary if you use them for eggs and meat preparations.
Ensure that you have coated the edges very well and evenly. I added a bit of extra chocolate to the bottom of each cup to ensure stability of the cup when the paper is removed. Chill the cups for at least 20 minutes to harden cups.
While the first batch of cups cooled, I prepared to melt the second half of the chocolate for the tops. I let it sit over the warm water in the double boiler to start to melt.
The peanut butter filling mix requires that you crush the graham crackers to a powder, leave no lumps or chunks, as they will remain in the peanut butter and later in your cups. I crushed my crackers by hand, but may try to use a rolling pin next time to remove more of the chunks of cracker. I also placed the peanut butter in the microwave for about 20 seconds to loosen it up. This made the mixing process go much smoother, literally.
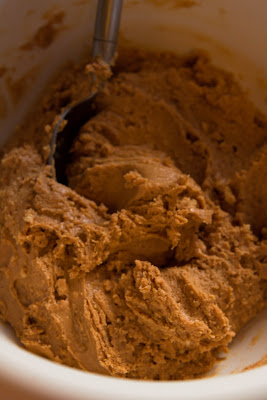
The peanut butter mixture is easiest divided up before you place it in the cups. I used a teaspoon and scooped a bit more than two heaping teaspoons for each lump of peanut butter filling. I made 24 cups and 24 little piles of peanut butter.
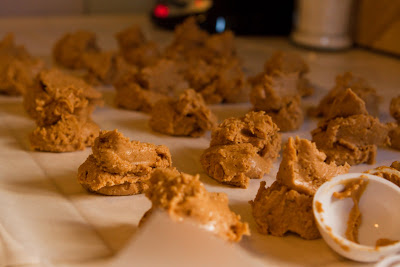
Pat each pile of filling into a flat disk or coin. The cold cups help to hold onto the peanut butter as you place them in the bottom of each cold cup. Smooth out any peaks as they will peak through the top of the chocolate later.
Melt the remaining chocolate until smooth. I portioned about 1 tablespoon of chocolate onto each cup, and added extra to the cups that were not covered. Gently shake the cupcake pan to even out the chocolate over each peanut butter filling. Allow air bubbles to pop and the top to level. You can leave the top smooth, or swirl with your spoon.
Chill the completed cups for at least 1 hour before serving or packaging. Normal cupcake sized cups are best cut into pieces before devouring, be prepared for a very luscious treat.Even my little one couldn't wait to try them...! 
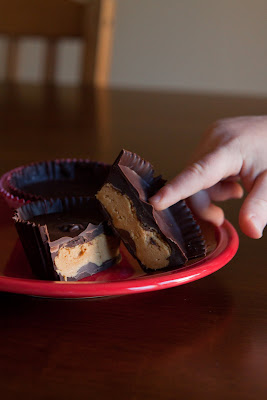
Recipe:
Makes 12 Cups (Double or triple as needed)
3 Cups Dark Chocolate (chopped or chips)
1 Cup Peanut Butter (I used smooth)
1/2 Cup Powdered Sugar (sifted)
1/4 Cup Crushed Graham Crackers
1 tsp Sea Salt
1 tsp Vanilla
Steps:
1. Melt 1 1/2 Cups of the chocolate in the double boiler.
2. Place 12 cupcake papers in a cupcake pan.
3. Coat the inside of each paper with the melted chocolate using a brush. Coat well.
4. Chill the chocolate cups for 20 minutes.
5. While the cups chill, melt the remaining chocolate over the double boiler. Keep warm but do not scorch.
6. Mix the peanut butter, powdered sugar, salt, graham crackers and vanilla until smooth.
7. Portion the peanut butter mix into each cup. Flatten the peanut butter filling with your finger.
8. Portion the remaining melted chocolate over each peanut butter filled cup. Lightly shake the pan to smooth the chocolate and remove air bubbles.
9. Chill for at least 1 hour.
10. enjoy!
Saturday, September 18, 2010
Vanilla Cupcakes with Blood Orange Olive Oil
This little treat came in my search to make the most of a special olive oil I recently purchased at "We Olive" in donwtown Ventura. The sales person sampled a lovely smooth olive oil with a tart blood orange flavor. The olive is sweet and savory at the same time.
This recipe includes a variety of my favorite ingredients. Olive oil, which is rich and smooth. Blood orange, reminds of my trip to Italy. Vanilla, the woody sweet notes are my favorite of all.
These cupcakes are so simple to make and can made in less than an hour! You could use plain olive oil in these, or hunt down your own special flavor at "We Olive" like I did. Another cool thing, is that "We Olive" will fill your containers with oil or vinegers for a per ounce fee. What a great way to try some new flavors!
Ingredients
1 1/4 Cup Flour
1 tsp baking powder
1/4 tsp baking soda
1/2 tsp salt
1 cup plain nonfat yogurt
1/2 cup white sugar
1/4 cup light brown sugar
1/3 cup blood orange olive oil (regular olive oil is okay!)
1 egg white
1/2 vanilla bean (removed from pod)
1/2 tsp vanilla extract
How To:
- Preheat oven to 350 degrees. Prepare cupcake tin with cupcake papers. Aproximately 12.
- Mix flour, salt, baking powder and baking soda.
- In seperate bowl, mix egg white, yogurt, vanilla bean, vanilla extract, and sugar until smooth.
- Blend the wet ingredients into the dry ingredients. Mix util smooth and free of lumps.
- Portion into cupcake papers.
- Bake until golden grown. 20-22 minutes. Use a toothpick to test if done. If the tooth pick is clean after plunging into a cupcake it is done. If sticky when it is removed, continue cooking until done.
- Let cool.
Vanilla Bean Frosting
1 Stick unsalted butter, softened
4 Cups Powdered Sugar
3 tsp milk or half n half
1/2 vanilla bean (removed from pod)
1 tsp vanilla extract
- Warm milk in microwave for 10-30 seconds. Acoid scalding
- Add vanilla beans to milk and let stand 10-20 minutes until cool.
- Blend butter, milk, vanilla beans and powdered sugar until smooth.
- Allow to set and frost cupcakes. If you prefer a runnier glaze, add 1-2 tsps more milk to thin.
- Enjoy!
These are very simple and I hope you try this recipe!
Sunday, September 5, 2010
Creme Brulee with vanilla beans

- Preheat oven to 300 degrees.
- Beat egg yolks in a glass bowl. Bowl can be used later as teh double boiler.
- Mix in 1/2 cup sugar and the 3/4 tsp vanilla into teh egg mixture.
- Heat the cream and half and half in a saucpan.
- Split the vanilla bean. Mix the beans in the cream and add the bean to liquid. Heat to a low simmer. Allow the mixture to heat for about 10 minutes. Do not boil. Stir often to avoid scorching.
- Remove teh cream from the heat and allow to cool for 10 minutes.
- Slowly add warm cream to the egg mixture. Stir constantly to avoid scrambling the eggs. This step is called "tempering". It allows the eggs to be warmed to the same temperature as the cream, without cooking or scrambling the eggs. Continue adding teh cream until the mixture is smooth and well stirred.
- Bring a saucepan of water to a low boil. Place the glass bowl, with cream and egg mixture on top of the boiling water pan.
- Stir the mixture on the double boiler until the mixture coats the back of a spoon. 2-5 minutes. Do not overcook. Remove from heat.
- Pour into small baking dishes or ramikens. Place on a baking sheet.
- Bake for 30 mintes.
- Remove from oven. Allow to cool to room temperature. Cool in refigerator for at least 1 hour, or overnight.
- Add 1 tsp of sugar to each dish.
- Heat under broiler or with a butane torch until golden brown and bubbly. Do not allow to overcook and burn.
- Serve or refrigerate again until cold again.
Serve with coffee or espresso.
Stuffed Passilla Chile (Vegetarian)

- Preheat oven to 400 degrees.
- Roast the pasilla and red bell pepper in oven or on grill. Remove charred skin. I place in a bag to steam for about 5 minutes before removing skins.
- In a saucepan saute the olive oil, onions, garlic, zuchini and corn until cooked but not browned.
- Add cumin, rice, cilantro, salt and pepper. Cook for 2 minutes until combined. Remove from heat
- Add crumbled mexican cheese to the mix. set aside.
- Slit the pasilla chiles and remove seeds. I leave the stem to hold the chile together.
- Add the rice mixture to teh chiles. Arrange in 9x13 pan. Top the filled chiles with the shredded monterey jack cheese.
- Bake the chiles for about 24 minutes. Allow cheese to get bubbly and brown.
Red Bell Pepper Sauce
- Roast the bell peppers and jalapenos. Remove skins and seeds.
- Add the remaining ingrediants to a blender and process until smooth. Set aside to serve.
Avocado Sauce
- Place all ingredients into the blender and process until smooth. Add additional yogurt and lemon if too thick. Salt and pepper to taste.
Serve the peppers on a plate with a base of the red bell pepper sauce and a side of the avocado sauce. In the future I may serve with pinto beans to boost the protein of the meal. A very nice and fresh dinner. Also, good as a leftover as a chilled salad.


